Page 1 of 2
First layer not 100% filled
Posted: Thu May 14, 2020 5:48 am
by patrickj
Hi,
Here is a picture from my last print, during the first layer:
It's far from perfect... What settings should I change to get a better first layer?
Factory file is attached.
Thanks,
Patrick
Re: First layer not 100% filled
Posted: Thu May 14, 2020 6:42 am
by jaro99
The nozzle is too high.
Re: First layer not 100% filled
Posted: Thu May 14, 2020 8:18 am
by zemlin
Reduce your bed gap so the extrusion spreads out more.
Re: First layer not 100% filled
Posted: Thu May 14, 2020 8:41 am
by Jarhead
You want the first layer to kinda squish onto the bed.
Your bed isn't level. See how towards the bottom of that pic you can see the extrusion as almost lines of plastic? Not being squished enough.
Yet the top of the picture the layers are more flat and pressed into the bed.
run the bed leveling again ( if you use one) or lift that edge of the bed up if you level manually.
You can actually count 6 rows of the brim in that pic but I bet you can't on the top side of the pic.
Re: First layer not 100% filled
Posted: Thu May 14, 2020 10:42 am
by patrickj
Thanks for your help. Here is a picture of the bottom of the piece printed:
I would say that the issue is the same all over the piece, don't you think so?
Concerning the bed levelling, I have a BL Touch. I have set the Z probe offset so that when Z is set to 0, I can slide a sheet of paper under the nozzle and feel it touching both the bed and the nozzle.
I have added a G29 command in the starting script, so bed levelling is done before each print. Here is the output of the last one I did:
Code: Select all
READ: Bilinear Leveling Grid:
READ:       0      1      2
READ:  0 -0.580 -0.625 -0.420
READ:  1 -0.665 -0.727 -0.614
READ:  2 -0.602 -0.710 -0.602
So what am I doing wrong?
Re: First layer not 100% filled
Posted: Thu May 14, 2020 1:21 pm
by Jarhead
Again, the first layer is too high. You want it to 'squish' more.
If it's even throughout the print, then as said by others, lower the nozzle. It's too high.
don't go by a piece of paper.
Re: First layer not 100% filled
Posted: Thu May 14, 2020 10:42 pm
by zemlin
A piece of paper is .1mm thick. Add .1mm to your Z offset so your zero is zero.
Re: First layer not 100% filled
Posted: Fri May 15, 2020 1:52 am
by lazymaniac
You can also modify First Layer Width in Layer tab. I had similar issue with rounded objects. Decreasing value form 150% to 120% allowed slicer to fit lines better.
Re: First layer not 100% filled
Posted: Sat May 16, 2020 5:53 am
by Seiphi
Good morning, sir,
I think I have a problem similar to PatrickJ's.
I have a BLtouch and I added the G29 in the starting Gcode.
However, it seems that simplify3D does not take into account the auto-leveling because as you can see on the picture above I am more squashed on the right than on the left.
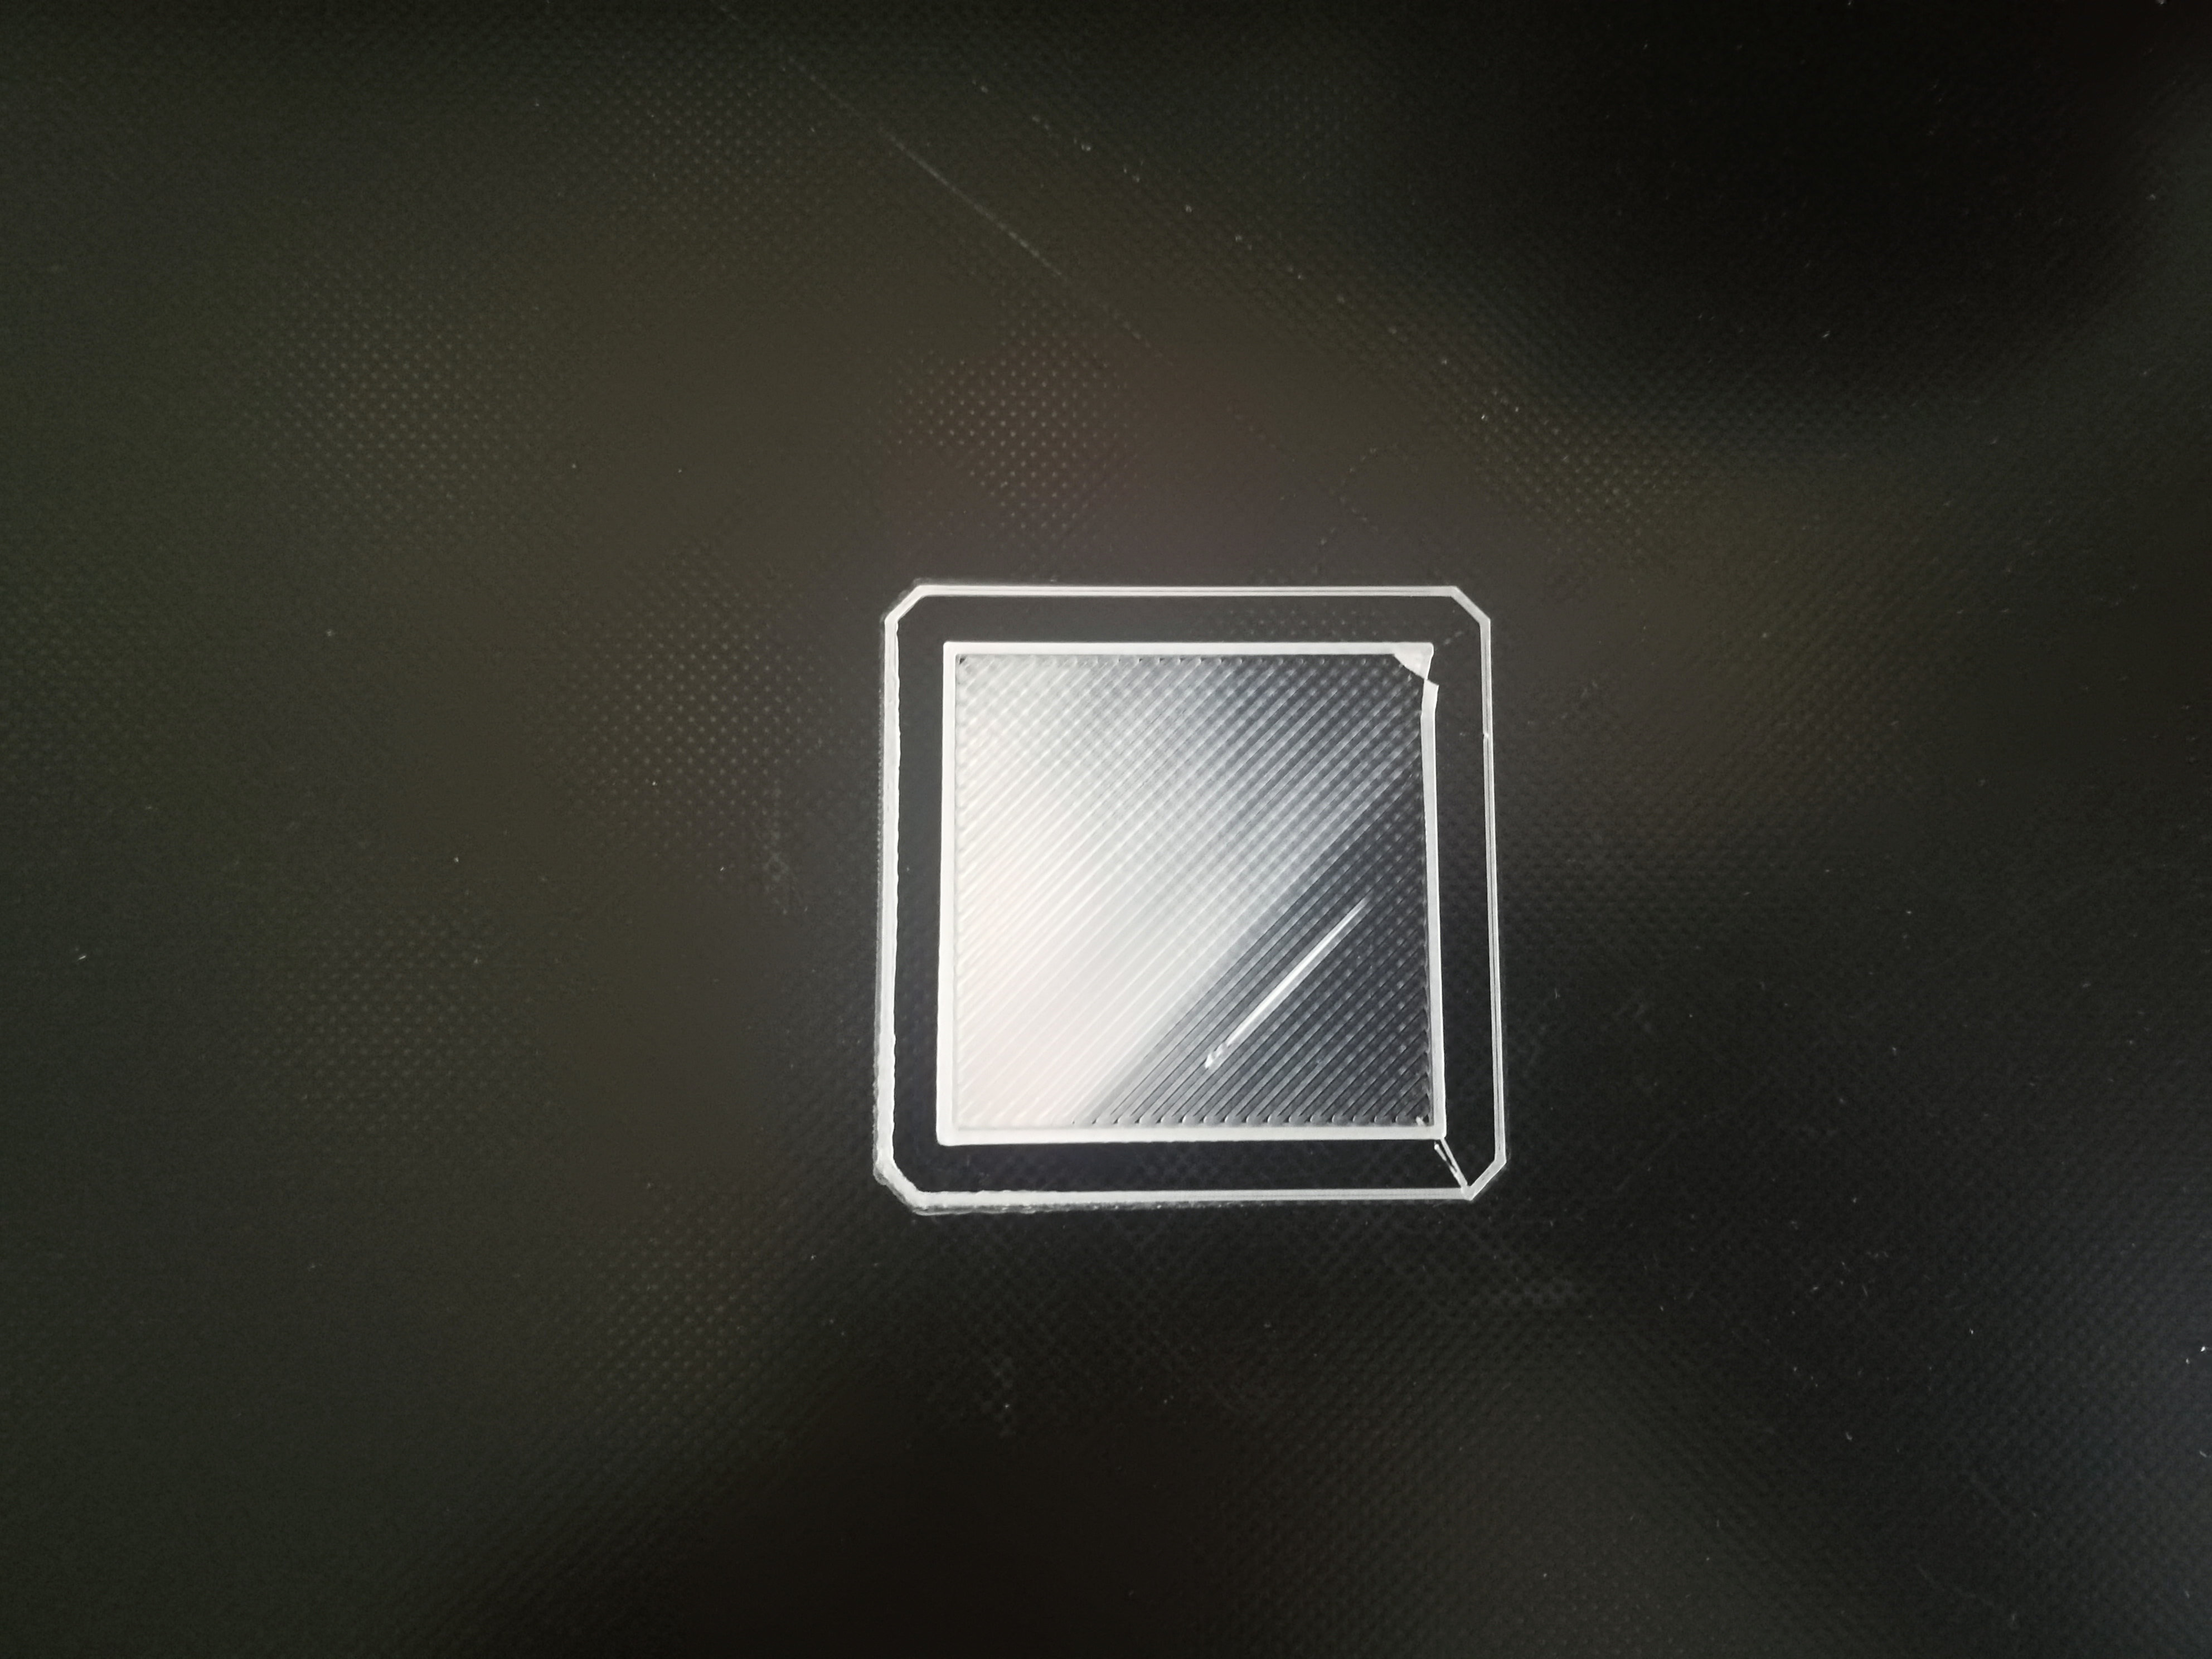
My bed has a hollow in the middle of it, hence the fact that I added the sensor.
Do you have any idea what the problem is?
The photo has been tested with a 0.1mm layer print with default settings.
Regards.
Re: First layer not 100% filled
Posted: Tue May 19, 2020 4:47 am
by patrickj
Playing with the different settings helped a lot, I have now a much better first layer, thanks for helping me.
Seiphi wrote:
Good morning, sir,
I think I have a problem similar to PatrickJ's.
I have a BLtouch and I added the G29 in the starting Gcode.
However, it seems that simplify3D does not take into account the auto-leveling because as you can see on the picture above I am more squashed on the right than on the left.
My bed has a hollow in the middle of it, hence the fact that I added the sensor.
Do you have any idea what the problem is?
The photo has been tested with a 0.1mm layer print with default settings.
Regards.
You should ensure that your G29 command is
after any G28 command, as the latter resets the levelling data.
